BeJewel Me!
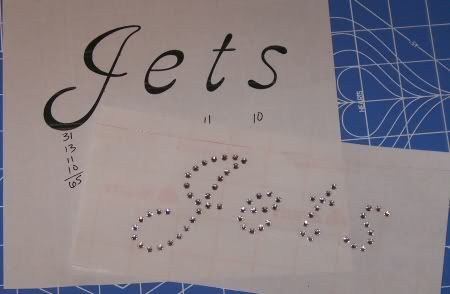
I have used my bejeweler a few times since I got it over a year ago. Last week my daughters' gymnastics coach asked if I could bejewel the Jets name for her to wear on a black tank top for the first sanctioned competition this season. Well, I thought how am I going to do that and still make it look good? I came across a few tutorials online that shows how to attach the rhinestone jewels onto a piece of mylar or sticky paper to then iron on to the shirt! So I printed out the word Jets in my favorite font, turned that paper backwards (so the letters were backwards), placed my sticky paper (sticky side up) on top of the printed paper, peeled back the white backing of the sticky paper, taped it down, and then placed my jewels (shiny side down, glue side up) on it with some tweezers! I placed the white backing back onto my sticky paper, then cut it down to size. Turned it over to reveal the shiny jewels and Im done!
Now, my daughters' coach can take the backing off, place her pattern onto her shirt, then, placing a towel over it to protect the plastic, iron the jewels onto the shirt. Turn the shirt inside out, place the thin towel over it, and iron it again. Tear off the sticky paper, run your fingers over it for any loose jewels, and wear it proudly!
Here's what it looks like when I finished the design. I will be sure to grab a picture of her wearing her shirt to show you what it looks like on!


 Thursday, September 6, 2007


1 Comments:
Where can we get your crochet designs?
Post a Comment
Subscribe to Post Comments [Atom]
<< Home